When conducting a welding operation, the best welding helmet is one of the most important protective gear. In today’s society, the majority of people prefer helmets that automatically darken as the conditions change. The welding process turns them into a darker shade, and they return to a lighter shade once it is completed. During the welding process, you will not need to pull the shield up and down.
You will eventually need to replace the batteries in your auto-darkening helmet if you own one. What is the process for changing the battery in a welding helmet? There is a learning curve to this, and it isn’t as simple as it sounds. We will assist you, however, as you attempt to tackle this task.
For you to understand this task better, we have divided it into several simple steps. Let’s dive into the action!

How to Change the Battery in Welding Helmet – Here are 7 simple steps to get started
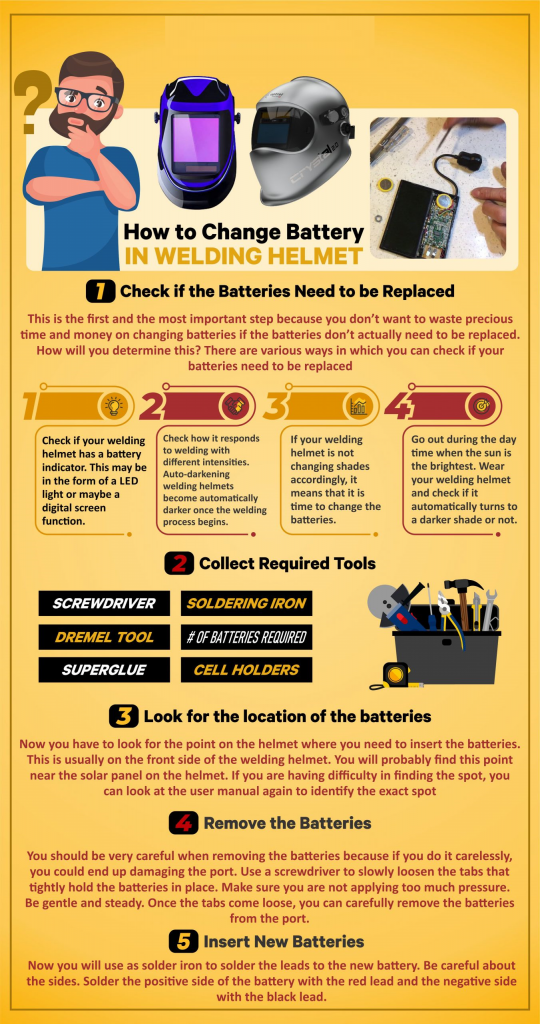
1. You should check if the batteries need replacing:
It’s important to be sure that the batteries need to be changed. If we don’t need to replace them, we’re wasting precious time and money. What is your plan to determine that? Checking if your batteries need to be replaced can be accomplished in several ways:
- Welding helmets often have battery indicators. A digital screen function or LED light may be used in this case. Make sure that your welding has a specification before you start welding. Depending on your helmet, you will tell if you need to change your batteries by checking the battery indicator.
- Try welding with different intensities to see how it reacts. A welding helmet with auto-darkening technology automatically gets darker once the process begins. If you do not know the shade change, it’s time to change the batteries.
- Take advantage of the brightest light in the daytime. You can check whether your welding helmet automatically turns a darker shade when worn. You can check if it returns to a lighter shade by putting your hands in front of the shield. You may need to replace the batteries in your welding helmet if you cannot correctly detect light intensity changes.
Related Article : BEST WELDING HELMET FOR MIG
2. Read the User Manual:
To correctly change the batteries in your welding helmet, you should read the instructions included in the user manual. Models and companies vary in their design, so it is very important to ask your particular model if it has some requirements.
3. Collect Required Tools:
Changing batteries requires certain tools, which you should gather beforehand then you will not have to run back to the shop for anything while the job is in progress. You should keep the following items on hand before starting to change batteries:
- Set of screwdrivers
- Soldering iron
- Dremel tool
- Number of batteries required
- Superglue
- Cell holders
Related Article : BEST WELDING HELMET -TOP PICKS AND REVIEWS

4. Look for the location of the batteries:
Then you will need to find the position on your helmet where the batteries need to be inserted. A welding helmet’s front side usually has this designation. On the helmet, you can probably find this point near the solar panel. Look again at the user manual if you are having trouble locating the spot.
To remove the plastic covering the batteries, you will have to place your welding helmet on a table and then use your Dremel tool to cut it out. Postage stamps will be roughly the size of this.
Related Article : BEST BUDGET WELDING HELMET UNDER $100
5. Remove the Batteries:
To prevent damaging the ports, you should be very careful when removing the batteries. Please take out the batteries with a screwdriver by slowly loosening the tabs that hold them in place. Take care not to exert too much pressure. Don’t rush. Stay calm and steady. The batteries can subsequently be carefully removed from the port once the tabs come loose.

6. Insert New Batteries:
As the new battery reaches its full capacity, you will need to attach the leads with a soldering iron. Sides should be taken into consideration. Attach the red and black information to the positive and negative sides of the battery, respectively. Once you have properly inserted all the batteries, you must use super glue to reattach the plastic portion you removed to secure the batteries. Securing everything should be a top priority.
Related Article : Best Welding Helmet for Beginners
7. Test The Helmet:
If the batteries have been replaced successfully, you should test the helmet to ensure it is working properly. Testing the helmet can be done in several ways. Putting on the helmet in the sun again and checking if the helmet’s shades change due to increased light intensity will suffice. To verify whether the shadows change properly at the right time, you can also try welding.

Having achieved this, you have replaced the batteries successfully. You need to open up the battery port again and make sure you have soldered properly and make sure that you are soldering the right sides to the corresponding leads. Another possibility is that the wiring connecting the batteries to the auto-darkening system may have a problem.
Related Reads : Best TIG Welder
Conclusion
Thanks for your assistance; we hope we were of help to you. By following the order correctly, you will be able to accomplish this task without asking for assistance. Due to their intricate mechanisms, welding helmets require care and gentle handling. You’re going to need new batteries, so good luck!